Kerlink Wirnet iZeptoCell
Registration and Configuration
If you have not done so already you will need to register your Gateway through your Developer or RAN Provider account using the steps below.
Prerequisites and Registration Information
Kerlink Basic Station Packet Forwarder application requires KerOS version 5.x or newer. Netmore recommends using KerOS version 5.10 or newer which includes valuable functionality improvements.
Note
Please consult Kerlink's access controlled documentation at https://wikikerlink.fr/ for more information including access instructions.
Kerlink technical support is open to direct customers and maintenance contract subscribers. Product serial numbers will be requested for assistance. Contact support@kerlink.fr with a valid serial number to get started.
The Hardware Serial Number (SN) and Gateway EUI values can be found on the Gateway packaging, through the interface hosted by the Gateway, or they may be provided by Kerlink.
Registration on the Netmore network
Two options are available to register the Gateway on the Netmore Network. 1. Kerlink's Zero-Touch-Provisioning feature, which is only available to Production users. 2. Manual registration, which can be utilized by both Developer and Production users.
Registration on the Netmore network via Kerlink Zero-Touch-Provisioning (ZTP) Feature (Recommended)
The Kerlink ZTP feature is integrated with the Netmore Base Station Provisioning API. The Gateway will automatically attempt to complete the ZTP process upon first boot with a working backhaul connection.
Kerlink's ZTP feature will automatically onboard the Gateway onto the Netmore Network into the user's account, provided the following prerequisites are satisfied: 1. A Customer API Key has been created with at least the RAN: Write Access role. Note the value in a secure location. 2. Provide the Kerlink support representative (support@kerlink.fr) with the following:
- The value of the generated API Key (preferably in a single-use URL).
- The Gateway Hardware SN and Gateway EUI value.
- Optionally, specify the other provisioning parameters defined here, such as the default sub-band.
Once the Kerlink support representative has processed the request, the iZeptoCell Gateway should automatically be enrolled in your account following its next power up cycle.
Manual Registration on the Netmore network
Follow directions in Kerlink's Wiki to access the Gateway's interface where the EUI and SN can be found. Once the Manufacturer (Gateway) EUI and Gateway SN have been acquired, return to the Netmore Portal and complete Registration.
Note
Users with a free Developer Account can find supplemental information using the following link: Generic Developer Gateway Registration Users registered as RAN Providers can find supplemental information using the following link: Generic RAN Provider Gateway Registration
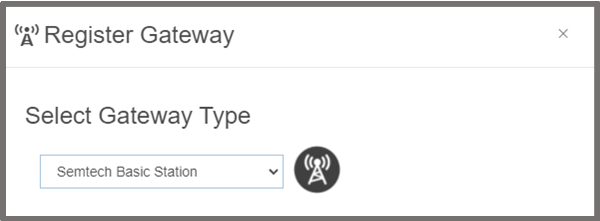
- Using any user account type with access to Gateway registration capabilities; when asked to Select Gateway Type during registration on the Netmore Portal, choose the
Semtech Basic Stationoption from the drop down menu.
- Enter the unique SN and Manufacturer EUI as required.
- Complete the registration process by filling in the remaining fields.
Note
The Gateway supports a maximum of 8 channels at any given time. During registration you will have a chance to select which sub-band of 8 RX Channels the Gateway should operate on to start. Tip: After registration is complete, you can use the Netmore Portal to reconfigure the RX Channel sub-band without the need to login to the Kerlink Gateway interface (make sure to power cycle the Gateway after making any changes).
Netmore LNS URI
The Netmore LNS protocol can be configured in two different ways: 1. Secured (Recommended) 2. Unsecured (Debugging and development purposes)
The Kerlink Gateway requires prerequisite configuration in order to operate as a Basic Station Gateway. Please follow the directions in the Kerlink documentation after login credentials have been established for the Kerlink Wiki. Once the basicstation.ipk package has been installed on the gateway, please move on to the next section to configure the Gateway for the Netmore Network. This step is only required when manually configuring the Gateway.
Note
Additional information regarding Basic Station can be found at the following link: Generic Semtech Basic Station
Secured LNS URI (Recommended)
- Ensure the basicstation.ipk package has been installed on the Gateway according to Kerlink's directions.
- A Kerlink tool named klk_bs_config is used to handle the configuration through the command line interface.
- A copy of the Netmore Server Certificate (tc.trust) can be downloaded directly from: Netmore TLS Server Certificate
- Through the command line interface, copy the downloaded Netmore Server CA Certificate onto the gateway using the example syntax provided by Kerlink.
- To configure the Gateway for the Secured Netmore LNS URI, use the command:
klk_bs_config --enable --lns-uri "wss://ns-gw.lns.netmoregroup.com:6042" - Save the changes and update the Gateway when prompted.
- Reboot the Gateway.
Unsecured LNS URI
- Ensure the basicstation.ipk package has been installed on the Gateway according to Kerlink's directions.
- A Kerlink tool named klk_bs_config is used to handle the configuration through the command line interface.
- A copy of the Netmore Server CA Certificate (tc.trust) is not required for unsecured configuration.
- To configure the Gateway for the Unsecured Netmore LNS URI, use the command:
klk_bs_config --enable --lns-uri "ws://ns-gw.lns.netmoregroup.com:6040 - Save the changes and update the Gateway when prompted.
- Reboot the Gateway.
Verifying Connection to the Netmore Network
Upon successful completion, the Gateway status will update to Registered - Active when viewed within the Netmore Portal, and the status indicator light will turn green.